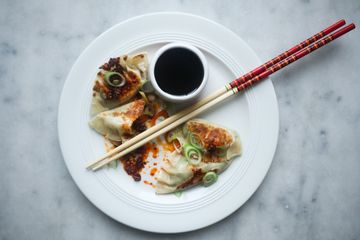
Gruyere, scallion and ginger gyozas
Jump to recipe
Stoked to tell you that sometimes gyozas contain cheese! What a time to be alive.
This week we’re dabbling in cheesy dumplings. A clever way to cook something other than pasta, without really making something other than pasta. Key ingredients, carbs and cheese, thankfully remain.
At Kaapse Maria, an absolute BANGIN resto recommendation for anyone in the 010 area, I first enjoyed similar cheesy gyozas, and damn. You will be wanting to make these in g-r-a-n-d-e quantities at many occasions. And while yes they're tasty and that's the most important, can we all take a moment to appreciate how this photo turned out compared to last week's?? Turns out the internet was right - daylight makes for better photo's and consequently: better lunch.
Ingredients #
Ingredients for 15-20 dumplings (which yes you can absolutely devour in one sitting by yourself, bless you)
- 200 gr Gruyere
- 2 thick scallions or 3 skinny bois
- A thumb sized piece of ginger
- Gyoza wrappers (frozen or fresh, works either way)
- Oil for frying (sunflower, rape-seed, something with a high smoke point)
- Sesame oil
- Black pepper
- Salt
- Soy sauce
- Rice wine vinegar
- Optional: chili crisp (you can find this in any Asian grocery store, and it tastes BOMB)
- Or any other sauce that you think you’d like to dip in! Wouldn’t be mad about a spicy mayo for example!
Method #
-
If using frozen gyoza wrappers take them out of the freezer to let them thaw, place them under a kitchen towel so they don’t dry out.
-
Grate the gruyere and finely chop the scallion and ginger. Reserve some pretty scallions for garnish at the end. Or don't. Add your grated cheese and finely chopped scallions and ginger to a bowl. Mix it together and add a good grind of black pepper, and a loving pinch of salt. Filling done!
-
Grab your gyoza wrappers and a small bowl filled with water. Using your hands take a teaspoon sized piece of your cheesy filling and squeeze it together. Yes, this is a little weird and no, in not many other instances will I ask you to squeeze your cheese. In this instance however it’s important because you want to ensure we pack as much cheese into these bois as we can? Right? Also: this will prevent the gyozas from deflating and will keep them nice and plump, which, btw, I find a delightful word. Now, place your mixture in the middle of a gyoza wrapper, dip one finger in your bowl of water and draw a circle around the outer half centimeter of the wrapper with your wet finger until it’s wet all around. Fold the wrapper in half, resulting in a little half moon. The water will help the gyoza wrapper to stick to itself.
-
You could absolutely skip this next step and continue with frying your delicious gyozas, but if you want to make the little foldy edges (pardon my technical jargon), bare with me as I attempt to describe how you can make them. Holding your half mooned gyoza in your hand, starting at either one of the ends, you are going to make small folds with the edge of the wrapper dough over your thumb nail as you move it bit by bit over to the other side. I am literally laughing out loud as I’m writing this down because for the life of me I can’t come up with a better way to put this into words. My sincere apologies, ya just gotta figure it out. Youtube it.
-
Once you have beautifully shaped your gyozas thanks to the astonishing clarity in my instructions it is now time to fry! Heat up a non-stick skillet that has a fitting lid (or pan/plate that fits over it) to medium high heat and add some vegetable oil. When the oil is hot-hot-hot add your gyozas and fry them crispy on two sides. When brown, golden and gorgeous you’re gonna grab a liiiiiiittle bit of water, we're talking half a shot glass, or for my Swedes who live in a half the size - thrice the price society: a normal shot. Add that to your pan and immediately close the pan with the lid. Steam the gyozas until the non-crisp parts of the wrapper are soft and pillowy - only a few minutes, by then the water will have evaporated. Now add a few drops of sesame oil and briefly re-crisp your gyoza bottoms.
-
Serve with some dashes of rice wine vinegar, as much chili crisp as you can possibly stomach and some dark soy sauce. Or eat it with spicy mayo! Or even dijon mustard? Wild - but probably delicious. These guys are gonna be a hit no matter the dip.
They're easy breezy and, well, cheesy, so you got nothing to lose, give'm a go and till next week!